Yeti
go.ncsu.edu/readext?301605
en Español / em Português
El inglés es el idioma de control de esta página. En la medida en que haya algún conflicto entre la traducción al inglés y la traducción, el inglés prevalece.
Al hacer clic en el enlace de traducción se activa un servicio de traducción gratuito para convertir la página al español. Al igual que con cualquier traducción por Internet, la conversión no es sensible al contexto y puede que no traduzca el texto en su significado original. NC State Extension no garantiza la exactitud del texto traducido. Por favor, tenga en cuenta que algunas aplicaciones y/o servicios pueden no funcionar como se espera cuando se traducen.
Português
Inglês é o idioma de controle desta página. Na medida que haja algum conflito entre o texto original em Inglês e a tradução, o Inglês prevalece.
Ao clicar no link de tradução, um serviço gratuito de tradução será ativado para converter a página para o Português. Como em qualquer tradução pela internet, a conversão não é sensivel ao contexto e pode não ocorrer a tradução para o significado orginal. O serviço de Extensão da Carolina do Norte (NC State Extension) não garante a exatidão do texto traduzido. Por favor, observe que algumas funções ou serviços podem não funcionar como esperado após a tradução.
English
English is the controlling language of this page. To the extent there is any conflict between the English text and the translation, English controls.
Clicking on the translation link activates a free translation service to convert the page to Spanish. As with any Internet translation, the conversion is not context-sensitive and may not translate the text to its original meaning. NC State Extension does not guarantee the accuracy of the translated text. Please note that some applications and/or services may not function as expected when translated.
Collapse ▲Using the Yeti Microphone
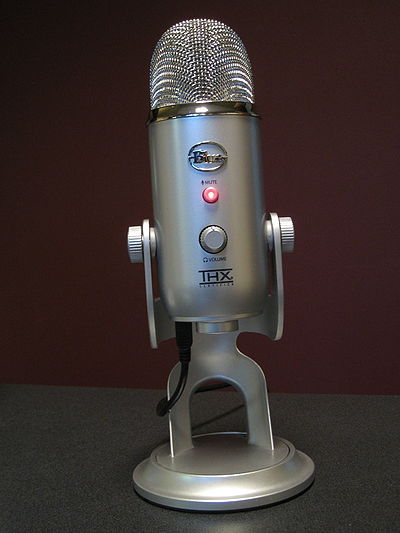
About the Yeti
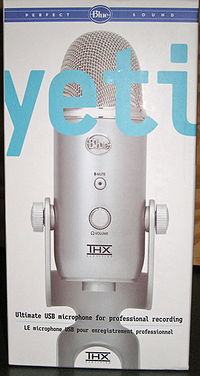 Unpackage, saving the package contents for storage
- Plug cable into your computer’s USB port and into the bottom of the microphone. The USB cable is required to use the mic with your machine as well as to power the microphone.
- If you are using the microphone for a web conference at your desk, you may want to plug in headphones for listening
- Select the microphone pattern appropriate for your usage. On the Pattern dial from left to right
- Stereo – two circles that intersect.
- Omnidirectional – a circle. This is mode is great for using Elluminate in a room with multiple speakers such as an Elluminate session in a conference room.
- Cardioid – a heart. This may be the most versatile mode. Use this to record a podcast or voice over or in a web conference at your desk.
- Bidirectional – an eight. This mode is good for recording an interview or any time there are two speakers across from each other.
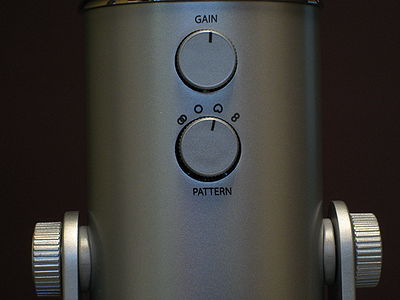
- Orient the microphone. The Blue logo should be pointed at the main speaker.
- Set the Gain. The gain controls the microphone sensitivity. Always start with this knob centered, adjusting as needed. If there is distortion, lower the gain by turning the knob to the left and if you need more sensitivity, turn the gain knob to the right.
- Mute button – when the mute button is solid red, the microphone has power. When the mute button is flashing, the microphone is muted.
- Volume – the volume knob controls the headphone volume
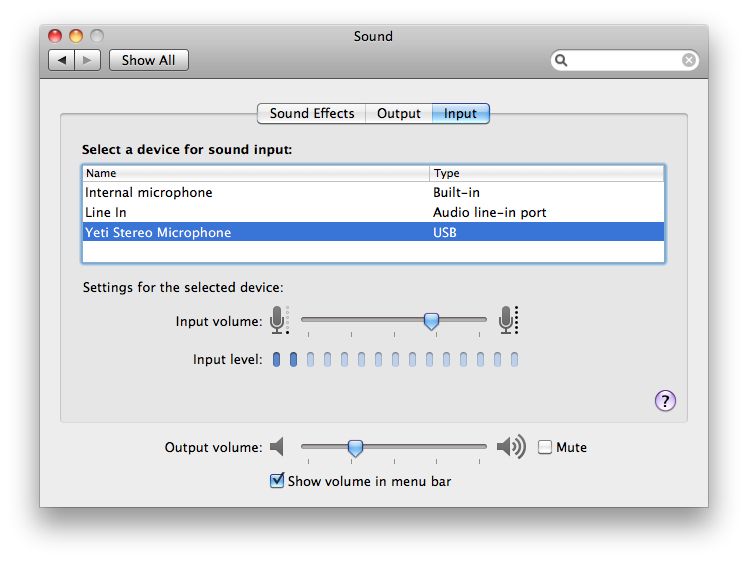
Using the Yeti with your Mac
- Go to System Preferences
- Select the Sound icon
- Click the Input tab
- Select “Yeti Stereo Microphone.”
- Set the “Volume Input” set to 80%
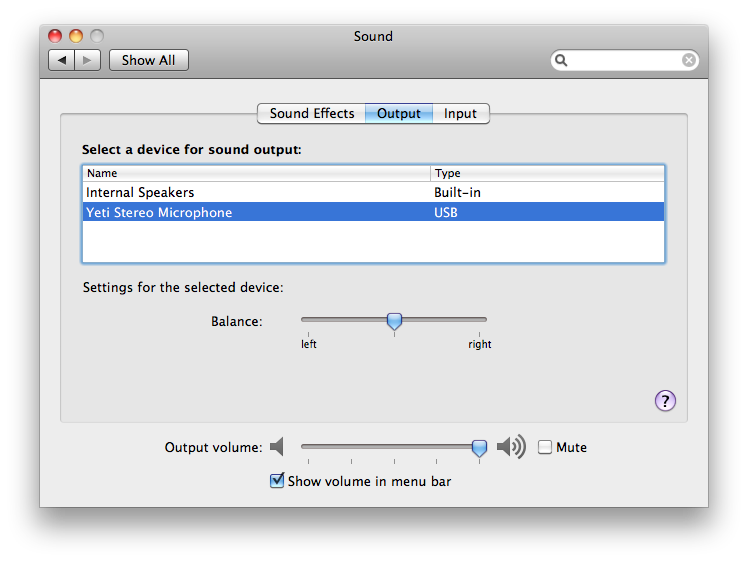
- If you are using the headphone jack on the microphone, select the Output tab and then click “Yeti Stereo Microphone.”
- Set the “Output Volume” to 100%
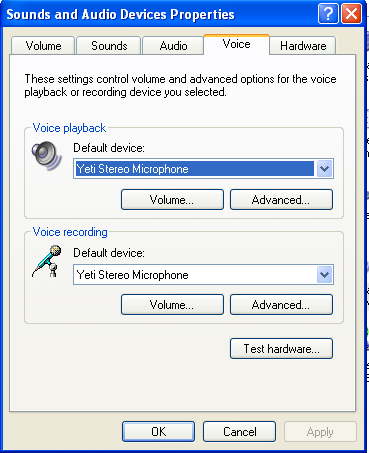
Using the Yeti with Windows XP
- Go to Start -> Control Panel
- Select the Sound & Audio Devices
- Click the Voice
- In the Voice Recording section, select “Yeti Stereo Microphone” from the drop down menu.
- If you are using the headphone jack on the microphone, in the Voice Playback section, select “Yeti Stereo Microphone” from the drop down menu.
Using the Yeti with Windows 7
- Click on the Windows icon in the lower left part of the screen and go to Control Panel
- Click on Sound
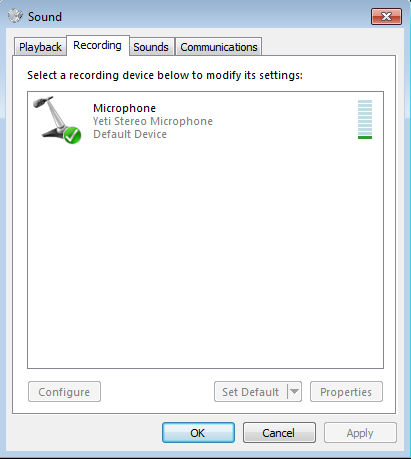
- Click on Recording and verify you see the Yeti Microphone with a green check mark
- If there is not a green check mark, right click on the Yeti Microphone and click on “Set as Default Device”
- If the microphone is working properly, you should see the volume bar on the right change as you speak into the “Yeti Microphone”.
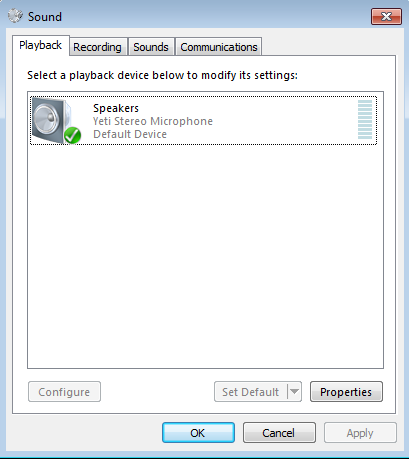
- If you are using the headphone jack on the microphone, select the Playback tab and then click “Yeti Stereo Microphone.”
- If there is not a green check mark, right click on the “Yeti Microphone” and click on “Set as Default Device”
Tips for using the Yeti in a web conference
Some experimentation may by required to optimize sound settings, especially when you are using web conferencing in a room setting, so plan ahead and allow time to test.
- To avoid potential feedback problems, use headphones whenever possible. If you are using speakers, make sure that the speakers are not pointed directly at the microphone. If is also a good idea to make sure that the volume of the speakers is low enough that it is not picked up by the Yeti.
- If it is not possible to face the speakers away from the microphone, you may need to have only one microphone open at a time rather than several simultaneous talkers.
- Another strategy to prevent this kind of feedback is to change the Preferences to “Mute speakers when “Talk” is pressed to prevent feedback.” This setting will function like as a walkie-talkie mode. If you select this option, you need to be aware that, when this option is enabled and the Moderator has configured the Elluminate Live! session to allow Simultaneous Talkers, when you have your Talk button pressed, you will not be able to hear others speak until you release your Talk button.
- When you plug in your Yeti, make sure your speaker volume is turned down and that your speakers are not near our microphone. This should help avoid creating a feedback loop. Once everything is plugged in, adjust your speaker volume.
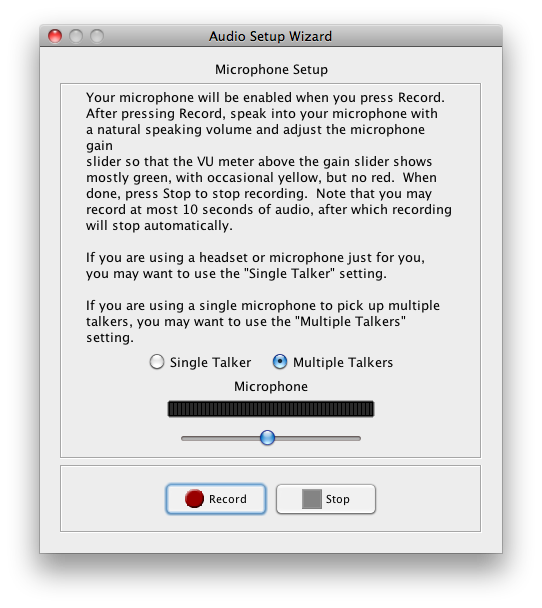
- It is always a good idea to run the Audio Setup Wizard before an Elluminate session. The Audio Setup Wizard is under Tools -> Audio -> Audio Setup Wizard.
- When you run this, you’ll have a chance to select the Yeti as your microphone for the session and to select Single Talker or Multiple Talkers. By going through this wizard, you can help to ensure that your audio levels are set correctly.


